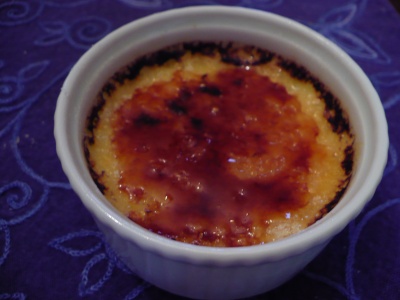
If you’ve been missing desserts since you went gluten free, then you’ve come to the right place. This is the last in a three-part series on eggs, and we’ve been learning how to crack and separate an egg, beat egg whites, and beat egg yolks. All three of these skill are used in gluten free baking, especially in desserts like meringues, crème brûlée, mousses, and Pavlovas.
In this post we’ll learn how to beat egg yolks to the ribbon stage, and then we’ll make some yummy crème brûlée.
Beating egg yolks is much simpler than beating egg whites. Your goal is for the color of the yolks to change from bright yellow-orange to a pale, pale yellow and for the yolks to thicken to the point that they fall from the beaters in a ribbon.
- Place chilled egg yolks in a mixing bowl and begin to beat them with a mixer or whisk.
- After beating the yolks a few times, gradually begin adding sugar, if the recipes calls for it.
- Continue beating the yolk until they thicken and the color of the yolks is pale yellow, like this.
When you pull the beaters or whisk from the yolks, the yolks should fall from the beaters in a ribbon.
When the ribbons hit the surface of the yolks, they should stay on top for a moment and then dissipate.
Instructions
(Yield: 6 servings)
- 6 egg yolks
- 6 Tbsp. sugar
- 1 c. whipping cream
- 1/2 c. soy milk (or whatever you use for drinking)
- Additional sugar for topping
- Preheat the oven to 300 degrees. Grease 6 ramekins and place them in a large glass casserole dish. Put a pot of water on to boil for the water bath.
- Beat the egg yolks, gradually adding the sugar, until the yolks are a pale yellow and fall from the beater in a ribbon.
- Gently whisk or stir in the whipping cream and soy milk. (Try to avoid creating air bubbles during this step.)
- Pour the mixture into the ramekins. Open your oven and pull the top rack of your oven out. Place the casserole dish on the rack, and then slowly pour the boiling water into the casserole dish. Gently push the rack back into the oven so that the water does not splash onto your crème brûlée. If you’re unfamiliar with preparing a water bath for custards, this is what it will look like once you get it all in the oven.
- Cook for approximately 45 minutes. The crème brûlée will still be a little wiggly in the middle, but it will firm up as it cools. Place the ramekins on a wire rack until they are cool enough to put in the refrigerator. Allow the crème brûlée to chill in the refrigerator for at least two hours (if you can wait that long!)
- prinkle 2 tsp. of sugar on each crème brûlée, and then either use a torch to melt the sugar, or put the ramekins in the oven under the broiler until the sugar liquefies and browns. Wait just a moment to let the sugar harden, and then enjoy!

MMM…my god. I love creme brulee. =)
In fact, it’s a regular on our menu here too.
I think you’ve inspired me to make some sweet creamy goodness!
And Mary – if you like creme brulee, try make a crema catalana – same concept with a teeny twist =)
Pingback: Crema Catalana - Gluten free naturally! « Gluten Free Gobsmacked